Setting Up and Using DiffDog for Salesforce.com Deployment Validation
There are a few different ways to deploy metadata from org to org with Salesforce.com. The three main options are to use Eclipse, to use Ant (the “Force.com Migration Tool”), or to use Change Sets. The first two are completely manual to set up (although Ant, obviously, is able to be run over and over again). Change Sets have a lot of promise, because they do handy things like searching for dependencies, but as of this writing, they are still prone to missing important bits, especially with profiles, so you can’t rely on them to produce a perfect deploy from one org to another. Consequently, it’s important to be able to quickly validate that a deployment was successful, and that everything that you meant to deploy from one org to another actually did get deployed.
Enter DiffDog…
DiffDog is a great tool for validating that the metadata between two orgs is identical, and, when used in conjunction with Eclipse, it can be used to push changes from one org to another. It can be used to compare any of the metadata types that are able to be checked out using Eclipse: Objects, Page Layouts, Profiles, Workflow, Reports, etc. The main benefit with this tool over other diff tools is that it allows for the comparison of XML files with ignoring the order of XML nodes. This is important because the metadata between two orgs is XML based, and can be functionally identical, but rendered in different orders. Because of this, with a regular flat-file diff tool, you will get lots of false positives. DiffDog can be configured to properly compare XML files, thus eliminating these false positives. This post describes some optimal settings for use with SFDC, and the process for comparing orgs and deploying changes.
To start with, download the tool from Altova:
http://www.altova.com/download/diffdog/diff_merge_tool_professional.html
Setup
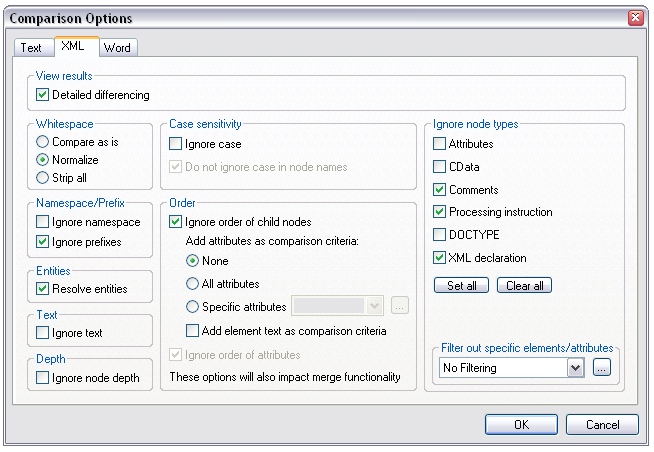
Once you’ve downloaded the app and registered it, go to the Tools menu, choose “Comparison Options”, and select the XML tab. This part is important: you want to make sure the comparison ignores the order of child nodes. This basically means that XML nodes can be rendered in any order and still be considered identical. Click the “Ignore order of child nodes” box in the Order section. All of the other options should be default, but double-check to make sure they match this screenshot.
Additionally, if “quick” diff is turned on for folder comparison (it will be by default), make sure to turn it off:
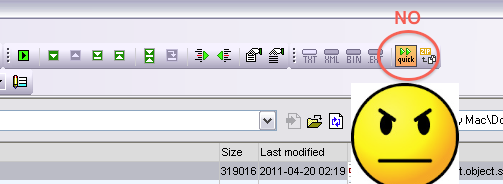
You want to do extension-based comparison (EXT):

Check Out the Orgs
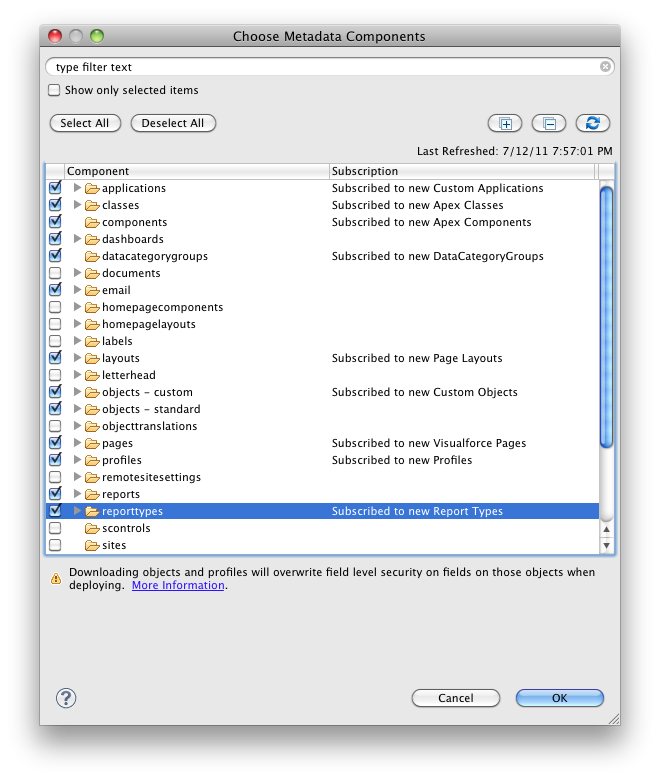
You will now have to check out the metadata objects that you want to compare from both SFDC orgs using Eclipse. Let’s assume one org is a sandbox and one is production. Note that if you want to compare profiles, you will need to select all of the metadata types for everything that you want to compare profile permissions for. For instance, if you want to compare Field-Level Security on Custom Objects, you will need to check out Profile metadata AND Custom Object metadata. SFDC only sends the profile metadata for the metadata types that you have checked out. If you try to do only profiles, the files will be practically empty.
The metadata from the two orgs that you checked out will be located in your Workspace directory. You can generally figure out where this is by right-clicking on one of the files in Eclipse, and selecting “Properties”.
Using DiffDog
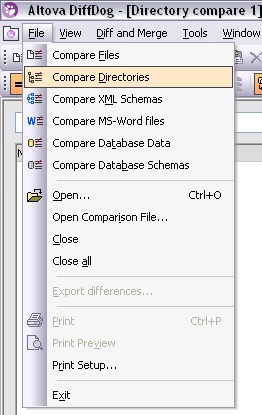
You’ll then want to pick a metadata type and open the two org’s folders for that type in DiffDog. For instance, to compare Objects, select “Compare Directories” from the File Menu…
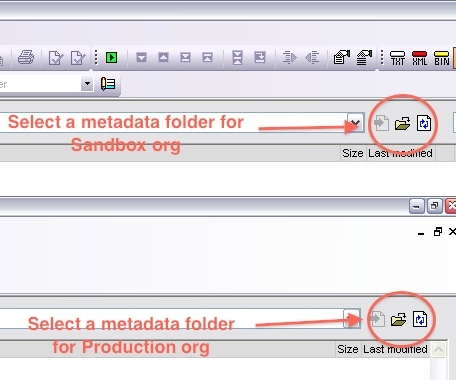
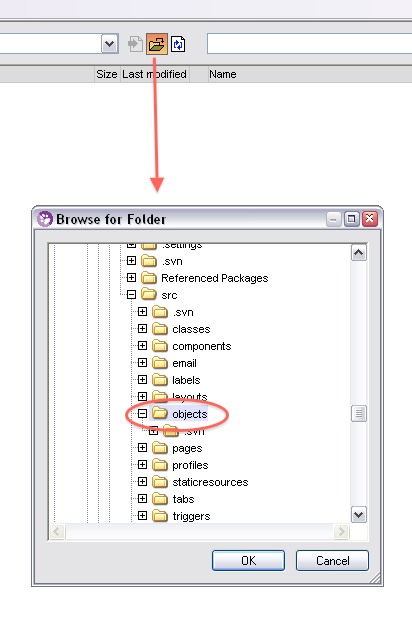
…and then select a metadata folder for each org. I’d suggest putting your sandbox org on the left and your production org on the right so that you’re moving changes from left to right, but you can do it either way.
Once you’ve done this, DiffDog will initiate a high-level diff of all files in the directories, and will display something like this. Lines displayed in black are identical, lines displayed in Red have differences, and lines in blue are missing in one org or the other.
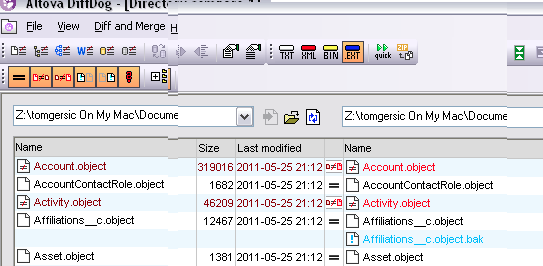
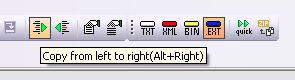
If you need to move an entire object over, you can do that here by clicking on the blue name and pressing the “Copy from left to right” or “Copy from right to left” button, depending on which direction you want to go.
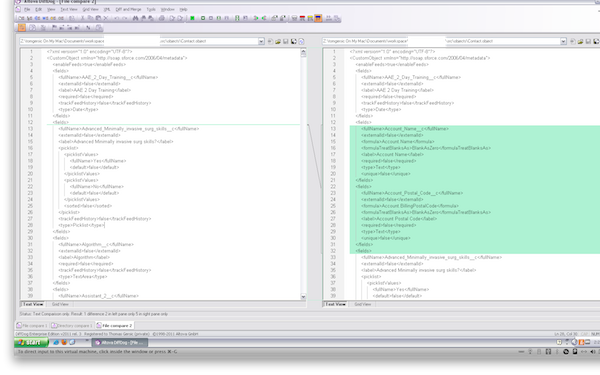
If you want to inspect the differences between two files, double-click on one, and it will launch a flat file-based diff that looks something like this:
This is not what you want. You want to select the “Grid View” tab at the bottom left of the window. This launches the grid-based diff tool that will show you differences between the two metadata objects:
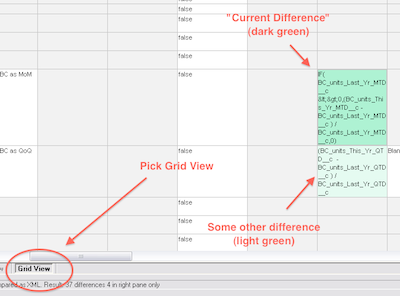
Differences are highlighted in light green, and the “current difference” is highlighted in a darker green. To move a change from one org to another, you’ll have to click on the box in the grid in the org you want to move FROM, and then click the “Make current difference” button in the top toolbar (or hit Alt-Enter) to highlight it in dark green.
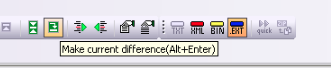
Once you’ve done this you can copy the change over with the “Copy from Left to Right” button:

Deploying Your Changes
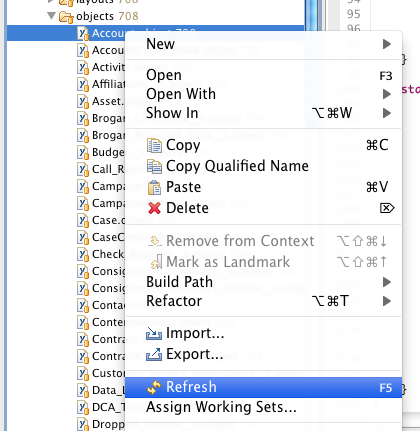
You’ll then want to save (Ctrl-S or File=>Save). This will save your changes locally. Note that they have not yet been deployed to SFDC. To do this, you’ll have to go back to Eclipse. Find the file (or group of files) that you saved in your Eclipse project, right click on it, and select “Refresh”. This will cause Eclipse to attempt to deploy your changes to SFDC. This could result in one or more errors, so be sure to watch the Problems tab for any errors. If you’re deploying to Production, this step can take some time if the org has a lot of Apex code, because all tests will be re-run when you deploy. A minute or so is common. 10-15 minutes isn’t unheard of.